If you’re building a PC or upgrading your current one, proper placement of fans is crucial for maintaining optimal operating temperatures. In addition, cable management is an essential aspect of building or upgrading a PC, as it not only makes the interior look clean and organized but also improves airflow and prevents overheating. To ensure your PC runs smoothly and efficiently, it’s crucial to follow the ultimate guide to placing PC fans and managing cables. This comprehensive guide will provide you with all the information you need to make informed decisions regarding fan placement and cable management, resulting in a sleek and functional PC setup.
1. Introduction
Building a custom PC is an exciting endeavor that allows you to customize and optimize your system for peak performance. One crucial aspect often overlooked is the proper placement of fans and effective cable management. In this comprehensive guide, we will explore the fundamentals of PC cooling, the different types of fans available, and the best practices for fan placement and cable management. By the end, you’ll have the knowledge and skills to create a well-cooled and tidy PC that not only runs efficiently but also looks stunning.
2. Understanding PC Cooling
To appreciate the significance of fan placement, it’s essential to grasp the basics of PC cooling and how fans contribute to efficient heat dissipation.
2.1. Airflow Basics
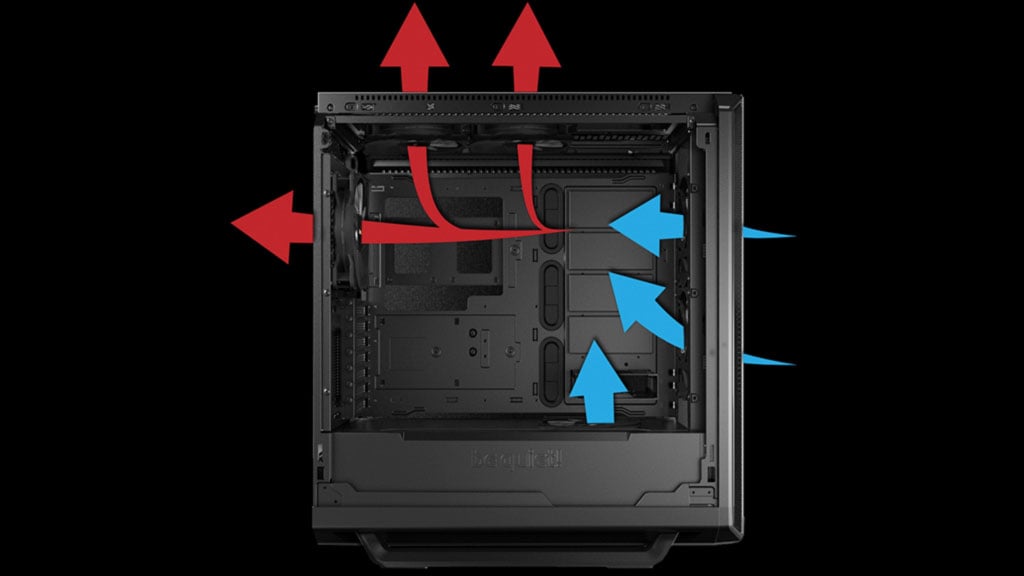
The primary goal of PC cooling is to remove the heat generated by various components, such as the CPU, GPU, and other internal parts. Airflow is a critical factor in this process. Cool air is drawn into the case through intake fans, and hot air is expelled through exhaust fans. The heat dissipation process is more efficient when there is a continuous flow of cool air over the components and a smooth exit path for the hot air.
To achieve efficient airflow, careful consideration of fan placement within the case is necessary. Creating a streamlined pathway for air to move from front to back ensures that components receive a fresh supply of cool air, while hot air is quickly expelled from the case.
2.2. Types of PC Fans
Before delving into fan placement, let’s explore the different types of PC fans available, each designed for specific applications. The most common fan sizes are 120mm and 140mm, with larger and smaller variants available as well. Here are some common types:
- Case Fans: These standard fans are used for general airflow within the case. They come in various configurations, including high-airflow and silent variants, catering to different cooling needs.
- CPU Fans: Typically used to cool the CPU, either as stock coolers provided with CPUs or aftermarket cooling solutions. CPU coolers can be air-based or liquid-based, with some enthusiasts opting for more robust liquid cooling solutions for improved cooling performance.
- GPU Fans: Found on graphics cards, GPU fans are designed to cool the GPU and VRAM. Many high-performance graphics cards feature advanced cooling solutions with multiple fans for better heat dissipation.
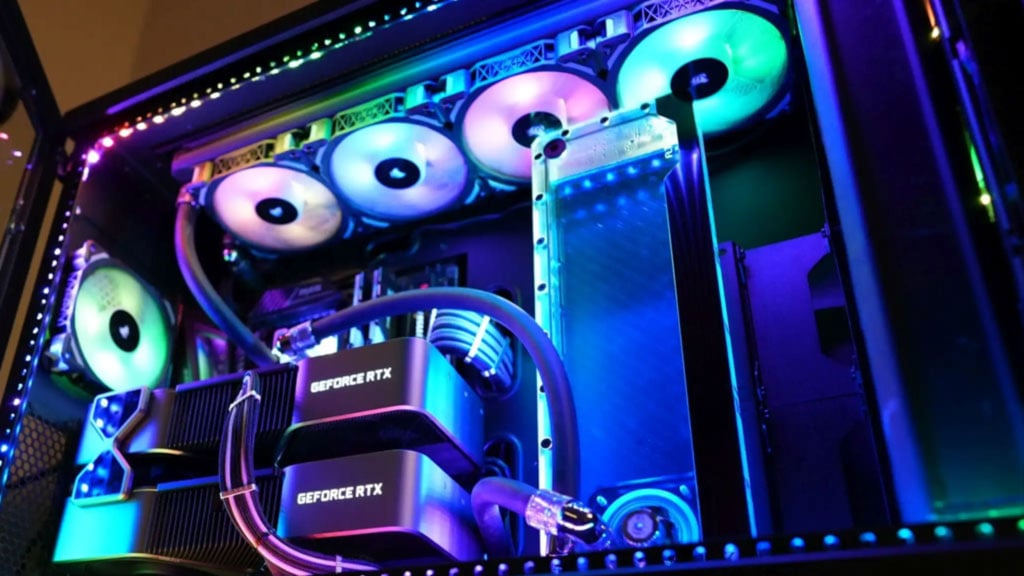
- Liquid Cooling Fans: Fans used in conjunction with radiator setups for liquid cooling solutions. These fans have high static pressure capabilities to push air through the dense fins of the radiator efficiently.
- PWM (Pulse Width Modulation) Fans: These fans allow for more precise control over their speed based on temperature changes. They are often used in conjunction with software that adjusts fan speeds dynamically to optimize cooling and noise levels.
When selecting fans, consider factors such as airflow (measured in CFM – cubic feet per minute), static pressure (important for radiator and heatsink applications), and noise levels (usually measured in decibels – dB). Additionally, fans with high-quality bearings (such as Fluid Dynamic Bearings or Ball Bearings) tend to be more durable and have lower noise levels compared to sleeve-bearing fans.
3. Preparing for Fan Placement
Proper fan placement starts with careful consideration of your case and component requirements.
3.1. Case Selection
The selection of an appropriate case is crucial as it determines the number of fans you can install and how effectively you can manage cables. Look for cases with excellent airflow design, including ventilation holes, dust filters, and ample space for fans on the front, top, rear, and potentially other areas.
Modern cases often come with cable management features, such as dedicated routing channels, grommets, and tie-down points, facilitating a cleaner and more organized interior.
3.2. Determining Fan Requirements
Assess your PC’s cooling needs based on your component choices, overclocking intentions, and ambient room temperature. More powerful components and aggressive overclocks will require more cooling, so plan accordingly. The goal is to create a balanced cooling setup without overloading the system with unnecessary fans.
Begin by evaluating the thermal performance of your components. Check the maximum temperatures recommended by the manufacturers and compare them to the average operating temperatures you expect. This will give you an idea of how much cooling capacity you need.
Consider the following components when planning fan placement:
- CPU Cooler: The CPU cooler plays a vital role in cooling the processor. Depending on the type of CPU cooler you choose (air or liquid-based), you may need to allocate space and plan for the airflow direction.
- GPU Cooler: Graphics cards come with built-in coolers, usually featuring multiple fans. Ensure that the GPU has enough clearance for proper airflow and that there is adequate exhaust capacity to dissipate the heat expelled by the GPU cooler.
- Storage Devices: If your case has dedicated mounts for SSDs or HDDs, ensure that these components do not obstruct airflow from the front intake fans. Some cases feature mounting brackets behind the motherboard tray, which keeps storage devices hidden and does not interfere with airflow.
After evaluating your cooling needs and component layout, you can determine the number and size of fans required for optimal performance.
4. Best Practices for Fan Placement
Now, let’s explore the best practices for placing fans in various areas of your PC case.
4.1. Front Intake Fans
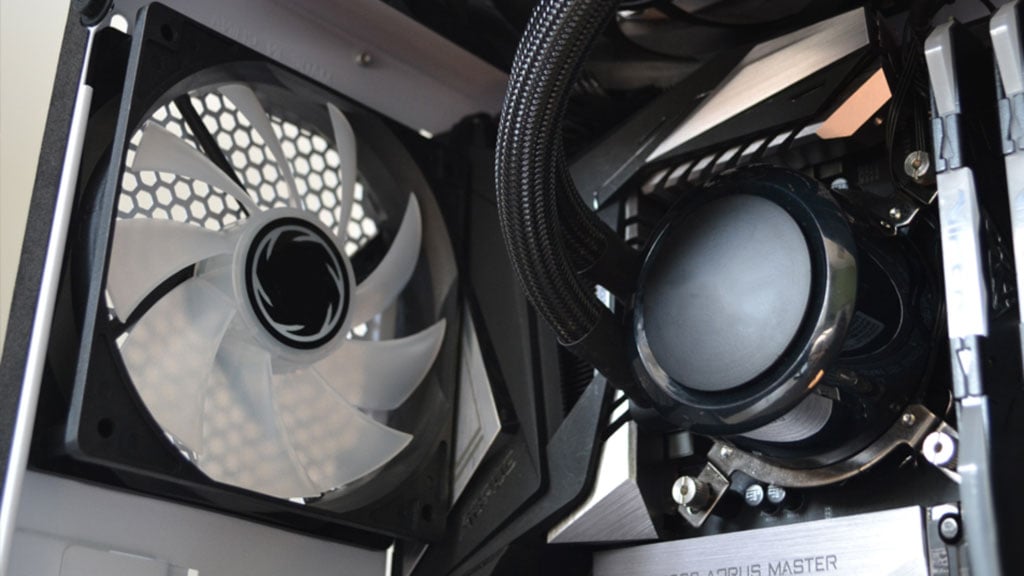
Front intake fans play a crucial role in bringing cool air into the case. They should be positioned to direct air over the main heat-generating components, such as the CPU and GPU. Installing high-quality dust filters on the front panel helps keep dust out of the case and prevents it from clogging the fans and components.
In most cases, it’s beneficial to have more than one front intake fan to ensure sufficient airflow. Dual front intake fans help create a balanced pressure inside the case and prevent hot spots from forming around critical components.
4.2. Top Exhaust Fans
Top exhaust fans are essential for expelling hot air that rises naturally within the case. They are particularly useful when using liquid cooling radiators at the front, as the hot air generated by the radiator needs an efficient way to exit the case.
The number of top exhaust fans required depends on the overall airflow design of the case and the heat output of your components. For smaller cases or systems with moderate thermal demands, a single top exhaust fan may be sufficient. However, larger cases or high-performance systems may benefit from two or more top exhaust fans for effective heat dissipation.
4.3. Rear Exhaust Fans
The rear exhaust fan complements the top exhaust fan, ensuring a smooth flow of hot air out of the case. This setup creates a natural path for airflow from front to back, carrying heat away from the components.
A single rear exhaust fan is usually sufficient for most builds, especially if you have balanced intake and exhaust configurations. However, you can also opt for two rear exhaust fans in larger cases or systems with higher thermal loads.
4.4. Side Panel Fans
Side panel fans can provide additional cooling to specific components, such as the GPU. However, their impact on overall temperatures may vary depending on the case design and component layout. In some cases, side panel fans can create turbulence, disrupting the smooth airflow within the case. Experiment with their placement and monitor temperatures to determine their effectiveness.
If you decide to install side panel fans, ensure they align with areas of high heat output, such as the GPU. If your case has multiple side panel fan mounts, consider using fan filters to prevent dust from entering through these openings.
4.5. Bottom Intake Fans
Bottom intake fans are less common but can be useful in some situations. If your case has a PSU shroud that separates the main chamber from the PSU area, bottom intake fans can help draw cool air into the PSU area, keeping it cooler and potentially extending PSU lifespan.
However, not all cases support bottom intake fans, and their effectiveness depends on the case’s design and the components used. If the case has limited bottom clearance or lacks dust filters for bottom intake, it might be better to focus on other fan placements.
5. Optimizing Fan Configuration
Balancing the airflow within your case is essential for efficient cooling. There are two primary configurations: positive and negative pressure.
5.1. Positive vs. Negative Pressure
Positive pressure occurs when you have more intake fans than exhaust fans. This setup helps prevent dust from entering the case through unfiltered openings, as the higher pressure pushes air out through the cracks. However, it may lead to warmer internal temperatures.
Negative pressure, on the other hand, is when you have more exhaust fans than intake fans. This configuration can lead to better cooling since the hot air is quickly expelled, but it may draw dust through unfiltered openings.
Achieving the right balance of positive or negative pressure can be tricky and depends on the case design, the number of fans, and the presence of dust filters. Generally, a slightly positive pressure setup is recommended, as it helps maintain a cleaner interior while still providing adequate cooling.
5.2. Push-Pull Configurations in PC Cases
In the world of PC cooling, efficiency is paramount. Keeping your system’s components at optimal temperatures ensures better performance, stability, and longevity. One popular method to achieve superior cooling is through the use of push-pull configurations in PC cases. In this article, we will explore what push-pull configurations are, how they work, and why they can significantly enhance your PC’s cooling capabilities.
Understanding Push-Pull Configurations
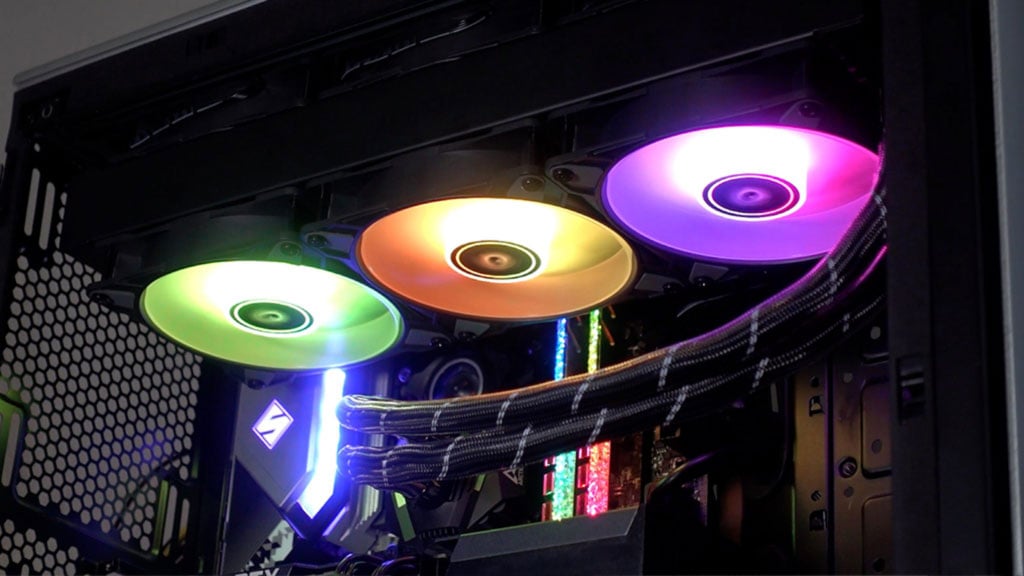
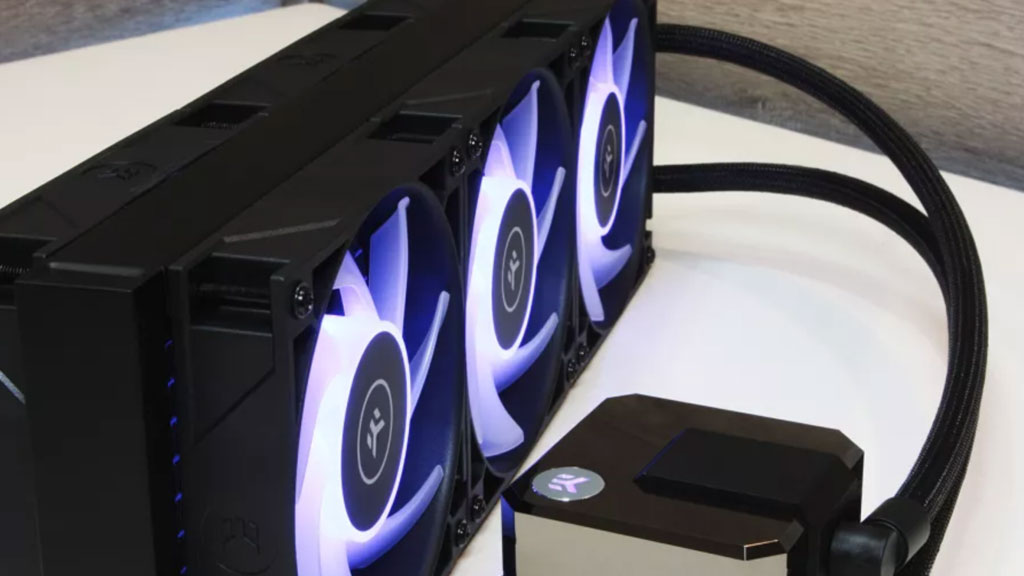
A push-pull configuration involves placing fans on both sides of a cooling component, such as a radiator or a CPU heatsink. One set of fans “pushes” air through the component, while the other set “pulls” air away from it. This approach is commonly used in liquid cooling setups, where radiators benefit from improved airflow through dense fins. However, push-pull configurations can also be applied to air cooling solutions.
To understand the benefits of push-pull configurations, let’s delve into how they work. In a standard single-fan setup, cool air is drawn in from one side of the cooling component (e.g., radiator or heatsink), passes through it, and is expelled out the other side. While this can effectively cool the component, it has limitations when it comes to overcoming airflow resistance.
In push-pull configurations, the combined force of both sets of fans creates more pressure, enabling air to move through the cooling component with greater ease. The push fans provide the initial boost, pushing air through the component and creating positive pressure. The pull fans then pull the air out, further increasing the airflow rate and ensuring that hot air is effectively removed.
Benefits of Push-Pull Configurations
Push-pull configurations offer several advantages over single-fan setups, making them a popular choice for cooling enthusiasts. Here are some of the key benefits:
- Improved Cooling Efficiency: The primary advantage of push-pull configurations is the improved cooling efficiency they provide. By combining the efforts of both sets of fans, airflow is increased, and heat dissipation becomes more effective. This is particularly beneficial when dealing with high-performance components or when overclocking, as it helps maintain lower temperatures under heavy loads.
- Lower Noise Levels: While push-pull configurations do use more fans, each fan can run at a lower RPM (revolutions per minute) to achieve the same level of cooling as a single-fan setup running at higher RPM. As a result, push-pull configurations often result in lower noise levels since the fans operate at reduced speeds while maintaining effective cooling.
- More Uniform Cooling: Push-pull configurations help distribute cooling more evenly across the cooling component. This results in more uniform temperatures across the entire surface, preventing hotspots and ensuring consistent cooling performance.
- Flexible Fan Options: With push-pull configurations, you have more flexibility in choosing fan types. For example, you can use high-static pressure fans on one side to push air through the cooling component and quieter fans on the other side to pull air out. This allows for a balance between performance and noise levels.
Implementing Push-Pull Configurations
To set up a push-pull configuration, you will need a cooling component that supports the mounting of two sets of fans. Most high-quality radiators and some premium CPU coolers come with this feature. When installing the fans, ensure they are aligned correctly to maximize airflow efficiency.
When choosing fans for the push-pull setup, consider factors such as airflow, static pressure, and noise levels. Fans with higher static pressure are beneficial for pushing air through dense fins, such as those found in liquid cooling radiators. Quiet fans for the pull side can help keep noise levels down while maintaining efficient cooling.
Tips and Considerations
Here are some additional tips and considerations when setting up a push-pull configuration:
- Fan Orientation: Ensure that the push and pull fans are oriented correctly for optimal airflow. The push fans should face the cooling component to push air through it, while the pull fans should face away from the component to pull hot air out.
- Fan Speeds: Experiment with fan speeds to find the right balance between cooling performance and noise levels. You may need to adjust the fan curves in your motherboard’s BIOS or use fan control software to fine-tune the RPM.
- Clearance and Compatibility: Check for clearance issues within your case to ensure that the push-pull configuration does not interfere with other components or obstruct airflow. Some cases may have limitations on radiator thickness, so make sure the combined width of the fans and radiator fits properly.
- Maintenance and Dust: Push-pull configurations can potentially collect more dust since there are more fan surfaces exposed. Regular maintenance, including cleaning the fans and radiator, is essential to maintain optimal cooling performance.
Push-pull configurations are a powerful tool for improving PC cooling efficiency, especially in liquid cooling setups. By combining the efforts of both push and pull fans, this setup enhances airflow, cools components more effectively, and provides more uniform temperatures. Additionally, push-pull configurations offer the advantage of lower noise levels compared to single-fan setups running at higher RPM.
When implementing a push-pull configuration, consider factors such as fan orientation, speeds, clearance, and compatibility to ensure seamless integration. With the right setup and attention to detail, you can take your PC cooling to the next level and enjoy a high-performance system with better stability and longevity.
6. Cable Management Techniques
Proper cable management not only improves airflow but also enhances the overall aesthetics of your PC build.
6.1. Planning Ahead
Before installing any components, think about how you’ll route the cables to keep them organized and out of the way of fans and airflow paths. Most modern cases have dedicated cable routing channels to help with this task.
Start by identifying the main cables you’ll need to manage, such as those for the motherboard, GPU, CPU cooler, and storage devices. Planning ahead allows you to route cables neatly and efficiently during the build process, preventing the need for disassembly later on.
6.2. Using Cable Ties and Velcro Straps
Cable ties and Velcro straps are your best friends when it comes to cable management. Use them to bundle together and secure cables neatly along the routing channels and behind the motherboard tray. This reduces clutter and allows for better airflow.
When using cable ties, avoid overtightening them, as this can damage the cables or restrict airflow. Instead, use just enough tension to keep the cables in place without causing strain on connectors.
6.3. Cable Routing Channels
Modern PC cases often come with built-in cable routing channels and grommets that facilitate efficient cable management. These channels allow you to hide cables from view, preventing them from obstructing airflow paths and creating a cleaner interior appearance.
When routing cables through these channels, make sure to separate power cables (e.g., 24-pin ATX, 8-pin CPU) from data cables (e.g., SATA, USB) to minimize electromagnetic interference. Additionally, try to group cables based on their destinations (e.g., all GPU cables together) to keep the interior organized and easily traceable.
6.4. Cable Combs and Sleeves
For a more polished look, consider using cable combs and sleeves to bundle and cover specific cables, such as those connecting to the GPU or motherboard. This not only hides the cables but also prevents them from obstructing airflow.
Cable combs are plastic or metal clips that hold cables in a parallel arrangement, giving the interior a cleaner and more professional appearance. Cable sleeves, on the other hand, are fabric or plastic covers that surround individual cables or cable bundles, providing a cohesive look to your cable management.
Keep in mind that cable combs and sleeves may add a bit of bulk to the cables, so ensure they don’t interfere with fans or other components.
7. Wrapping It All Up
Proper fan placement and cable management are vital for building a high-performance and aesthetically pleasing PC. By understanding the principles of airflow, using the right fan configurations, and applying cable management techniques, you can create a well-cooled and organized system that not only runs efficiently but also looks fantastic.
Remember to choose quality fans, plan your setup carefully, and be patient during the building process. With attention to detail and proper execution, you can build a PC that not only performs exceptionally but also impresses with its clean and organized interior. Enjoy the satisfaction of a well-built PC that you can proudly showcase to others. Happy building!


